Menghini Liver Biopsy Needle:Transjugular Liver Biopsy (TJLB): Instrument Standardized Preparation And Comprehensive Operational Procedure
Apr 09, 2026
Transjugular Liver Biopsy (TJLB): Instrument Standardized Preparation and Comprehensive Operational Procedure
Transjugular Liver Biopsy (TJLB) is a critical interventional diagnostic technique in hepatology, particularly suitable for patients with contraindications to the percutaneous approach. This protocol, based on the "Expert Consensus on Transjugular Liver Biopsy" by the Chinese Society of Hepatology (2022), provides a systematic and detailed description of the standardized instrument preparation and step-by-step operational procedure, aiming to offer clear guidance for clinical practice.
I. Standardized Instrument Preparation Checklist
To ensure the safety and efficiency of the procedure, the following complete set of instruments should be prepared preoperatively according to the standard protocol. The use of a pre-packaged, dedicated TJLB kit is recommended to enhance efficiency and minimize contamination risks.
Instrument Category Specific Instrument Specifications/Model Requirements Function and Purpose of Selection
Vascular Access Establishment 1. Vascular Access Needle 18G Initial venous puncture.
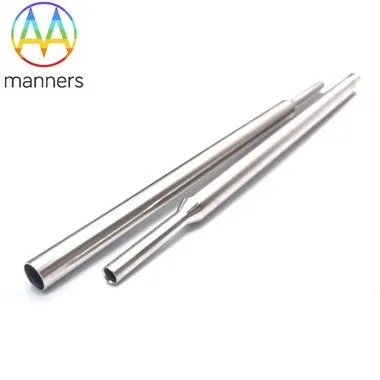
2. Short Vascular Sheath 9F–10F, length 10-15 cm Establishes a stable working channel in the internal jugular vein.
3. Long Vascular Sheath 9F–10F, length 40 cm Provides additional support, used when the hepatic vein anatomy is challenging, making it difficult to stabilize the introducer.
4. Guidewire 0.035-inch hydrophilic "Glidewire" Initial access and catheter exchange.
5. Stiff Exchange Guidewire 0.035-inch Amplatz-type or equivalent Provides strong support for placing the long sheath or introducer.
Catheterization and Measurement 6. Angiographic/Selective Catheter 5F C2 (Cobra) catheter, J-tip multipurpose catheter, or single-curve catheter Superselective catheterization of the hepatic vein for angiography.
7. Pressure Measurement Catheter (Optional) 5F double-lumen pressure measurement catheter For measuring the Hepatic Venous Pressure Gradient (HVPG) during the procedure, if needed.
8. Swan-Ganz Catheter (Optional) Standard Swan-Ganz catheter Used if a simultaneous right heart catheterization is required.
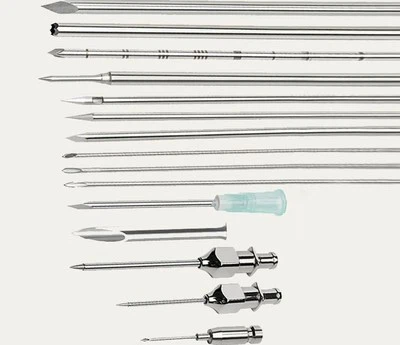
Core Biopsy System 9. Transjugular Liver Biopsy Kit Dedicated kit Contains the transjugular puncture introducer (9-10F curved cannula) and the transjugular biopsy needle(s). This is the core operational component.
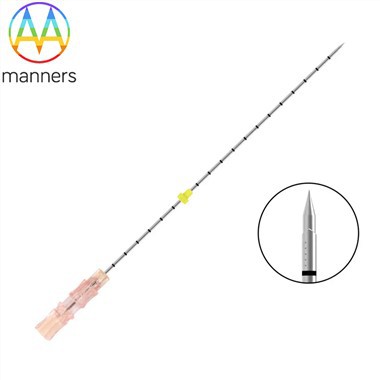
Biopsy Needle Options 10. Biopsy Needle Tru-Cut semi-automatic biopsy needle or Menghini biopsy needle Tru-Cut needles are more commonly used in clinical practice in China. Choice depends on operator experience and lesion characteristics.
II. Standardized Intraoperative Procedure (Step-by-Step)
Phase One: Patient Preparation, Monitoring, and Anesthesia
1. Monitoring: Continuous electrocardiographic monitoring throughout the procedure, tracking heart rate, blood pressure, oxygen saturation, and respiratory rate. Administer oxygen via nasal cannula (1-2 L/min).
2. Anesthesia:
* Baseline: Typically performed under local infiltration anesthesia (1% lidocaine).
* Conscious Sedation/Analgesia: For patients with low pain tolerance, anxiety, or poor cooperation, conscious sedation should be administered by an anesthesiologist. A recommended regimen includes: Midazolam (low dose, e.g., 1-2 mg IV push) combined with Sufentanil (5-10 µg). This regimen effectively alleviates discomfort with minimal impact on circulation.
* General Anesthesia: Reserved for special cases involving extreme anxiety, inability to cooperate, or anticipated procedural complexity.
Phase Two: Establishing Venous Access
1. Access Selection: The right internal jugular vein is the preferred approach due to its straighter anatomical path, which facilitates instrument manipulation. The left side is an alternative if the right side is unsuitable (e.g., due to thrombosis or anatomical anomalies).
2. Puncture and Sheath Placement: Perform real-time ultrasound-guided puncture of the internal jugular vein. Upon successful access, insert a 9-10F short sheath. Ultrasound guidance significantly increases the first-attempt success rate and reduces complications like pneumothorax and hematoma.
Phase Three: Hepatic Vein Catheterization and Positioning (Core of Image Guidance)
1. Hepatic Venography: Introduce a 5F angiographic catheter (e.g., Cobra catheter) through the short sheath. Under fluoroscopic guidance, superselect the catheter into the target hepatic vein (usually the right hepatic vein). Inject contrast to confirm:
* Patency of the hepatic vein.
* The course, branches, and the angle between the hepatic vein and the inferior vena cava (IVC).
* The optimal position for subsequent introducer placement.
2. Introducer Placement:
* Advance a stiff exchange guidewire through the catheter deep into the target hepatic vein.
* Remove the catheter, and advance the transjugular puncture introducer over the guidewire. Position its tip 1-3 cm from the ostium of the hepatic vein. This location provides stable support while avoiding excessively deep penetration.
* Management of Special Situations: If the angle between the hepatic vein and the IVC is too acute, making it difficult to stabilize the introducer, a 40 cm long sheath can be advanced into the hepatic vein over the guidewire first. The introducer is then placed through this long sheath, utilizing its supportive function to stabilize the system.
3. HVPG Measurement (if required): If HVPG measurement is needed, it should be performed before biopsy. Use the introducer or a separate 5F double-lumen pressure catheter to measure the free hepatic venous pressure and wedged hepatic venous pressure for calculating HVPG. Post-biopsy measurements may be inaccurate due to pain or vascular spasm.
Phase Four: Liver Tissue Biopsy (Two Main Techniques)
A. Tru-Cut Semi-Automatic Biopsy Needle Technique (Most Common in China)
1. Biopsy Needle Preparation: Load the Tru-Cut needle by pulling the handle at the rear backward until a clear "click" is heard, indicating the needle is cocked (pre-fired). Ensure the inner stylet and outer cannula move smoothly.
2. Puncture and Sampling:
* Under continuous fluoroscopic monitoring, advance the cocked Tru-Cut needle through the introducer until its tip reaches the tip of the introducer.
* Gently steer the introducer tip toward the target biopsy direction and apply gentle forward pressure to stabilize it against the hepatic vein wall.
* Quickly advance the biopsy needle 1-2 cm into the liver parenchyma (needle tip movement visible under fluoroscopy).
* Firing: While holding the needle position stable, firmly press the firing button/mechanism with the thumb. The inner stylet is rapidly propelled forward, followed immediately by the outer cutting cannula, completing the tissue cutting and capturing action.
* Dwell Time: After firing, maintain the needle position for 5-10 seconds to allow the tissue in the specimen notch to be fully cut and stably captured.
3. Needle Withdrawal and Sample Handling:
* Withdraw the entire biopsy system (introducer + biopsy needle) smoothly and slowly to the exterior.
* Extract the inner stylet from the outer cannula. The liver tissue core will be visible in the specimen notch. Gently tap or rinse the core into a container filled with saline or formalin fixative, or adhere it to a dedicated filter paper strip. Avoid using the needle to directly probe the tissue to prevent fragmentation.
4. Immediate Complication Check: Inject a small amount of contrast medium through the introducer again. Observe for any extravasation of contrast into the peritoneal cavity to immediately rule out hepatic capsular penetration.
B. Menghini Aspiration Biopsy Technique
1. Instrument Setup: Advance the Menghini biopsy needle together with its outer cannula/introducer to a position 3-4 cm within the hepatic vein.
2. Puncture and Aspiration:
* Quickly advance the biopsy needle 1-2 cm into the liver parenchyma in the target direction.
* An assistant immediately connects a 20 mL syringe to the needle hub and initiates and maintains strong, continuous negative pressure suction.
* While negative pressure is maintained, the operator withdraws the entire needle assembly smoothly and rapidly.
3. Sample Handling and Check: Process the aspirated material similarly to the Tru-Cut method, flushing it onto a filter or into fixative. A post-biopsy contrast check is also mandatory to exclude complications.
Phase Five: Post-procedural Management
1. Repeat Sampling: To ensure an adequate specimen for pathological diagnosis, typically repeat the biopsy 1-2 times in different directions from the same hepatic vein access.
2. Intra-procedural Monitoring Key Points: Maintain close monitoring throughout, especially when instruments are traversing the right atrium. Watch for patient complaints (e.g., arrhythmia, chest pain, dyspnea) and changes in vital signs.
3. System Removal and Hemostasis: After confirming no active bleeding, withdraw all catheters, guidewires, and the vascular sheath. Apply effective manual compression to the jugular vein puncture site (typically for 10-15 minutes), followed by a pressure dressing.
III. Summary of Core Procedural Points and Risk Control
- Imaging Guidance is Paramount: The entire procedure relies on dual guidance from fluoroscopy and ultrasound to ensure correct pathing and precise targeting, which is the primary guarantee of safety.
- Hepatic Vein Selection is Crucial: Based on venography findings, select a hepatic vein that is relatively large in caliber and has a straighter course (typically the right hepatic vein) to facilitate introducer stability and effective sampling.
- Adherence to "Gentle" and "Stable" Principles: All advancing and steering motions should be gentle to avoid hepatic vein injury from excessive force. The introducer must be firmly and stably positioned against the vein wall before biopsy to prevent "slipping."
- Immediate Complication Detection: Performing routine hepatic venography after each biopsy pass is the most direct method for detecting acute complications such as capsular perforation or arteriovenous fistula.
- Teamwork and Contingency Planning: The procedure requires a collaborative team of experienced interventional physicians, anesthesiologists, and nurses. Emergency medications and equipment must be readily available to manage rare but serious complications (e.g., cardiac tamponade, major hemorrhage).
Conclusion: Transjugular liver biopsy is a mature and safe interventional technique. Its success depends on standardized instrument preparation, strict adherence to the image-guided procedural steps, and precise attention to detail. Mastery of this technique provides vital pathological diagnostic information for a significant number of liver disease patients for whom percutaneous biopsy is not an option.