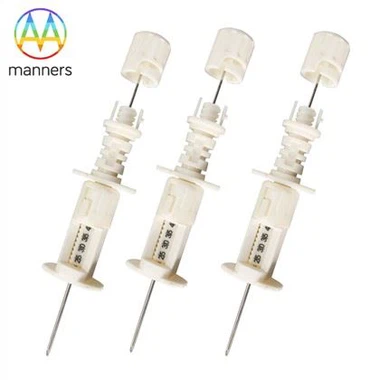
Inside A Lancet Factory: From Wire To Sterile Pack
Nov 15, 2026
A lancet is one of the smallest products in a hospital, and one of the most demanding to manufacture. It combines precision grinding, polymer moulding, cleanroom assembly, sterilisation, and packaging into a single unit that must perform identically across millions of pieces. This article describes the production chain behind a solid lancet such as the Blood Lancet Needles With Three Bevel End, and explains what each stage contributes to the finished performance.
Stage 1: Incoming Material and Verification
Production begins with verification, not with machining. Stainless steel wire or strip is received against a material specification, checked for grade and dimensional conformance, and released to production only when the documentation matches.
For a cutting instrument, incoming material condition matters more than the general grade description. Wire diameter consistency affects how the tip is formed; surface condition affects how cleanly the facets can be ground; and mechanical properties affect how the edge behaves after grinding. Suppliers that control incoming material tightly experience fewer downstream edge defects.
Hub polymers are received in parallel, with verification of grade and, where relevant, colour masterbatch consistency. Colour is not cosmetic on a lancet - it frequently encodes depth or diameter, so colour variation is a configuration control issue.
Stage 2: Needle Forming and Grinding
This is the heart of the process and the stage that determines whether the product performs.
Tip forming. The needle end is shaped to the base profile from which the bevels will be ground. Consistency here determines how much material each grinding operation must remove, and therefore how stable the grinding process can be.
Bevel grinding. For a three bevel end, three separate grinding operations produce three facets that must converge at a common apex. Each operation has its own parameters: abrasive specification, wheel or belt condition, feed rate, coolant, and fixturing. The fixtures are the critical asset, because they must locate the part identically across all three operations.
Tool wear management. Grinding media degrade progressively, and wear shows up first as edge quality, then as geometry. Production that manages tooling by measurement - inspecting edge condition at defined intervals and replacing tooling on evidence rather than on schedule - holds its capability. Production that manages tooling by calendar experiences drift between audits.
Edge inspection. Magnified inspection of the ground edges and the apex, at a defined sampling frequency, against defined acceptance criteria. For a three bevel tip, the apex must be inspected from more than one orientation, because a misaligned third facet can look correct in silhouette.
Stage 3: Cleaning and Preparation for Assembly
Ground parts carry abrasive residue, metal fines, and coolant. Cleaning is validated as a process, not performed as a rinse. Residue on a device that will enter skin is a biocompatibility issue as well as a performance issue, and the cleaning validation should be documented as such.
Cleaning also creates a risk: handling after cleaning can damage a fine edge. Good practice minimises manual handling between cleaning and assembly, and uses trays or magazines that do not contact the cutting edges.
Stage 4: Hub Moulding and Assembly
Hubs are moulded to a specification that includes material, colour, and critical dimensions - particularly any feature that determines how far the needle protrudes, in depth-controlled designs. Assembly inserts the needle into the hub to a controlled depth and fixes it so that the protrusion length is within tolerance.
Two controls matter most at this stage:
Insertion depth control. The difference between a good and a poor lancet can be a fraction of a millimetre in protrusion length. This dimension should be measured on sampled assemblies, not assumed from the machine setting.
Pull and alignment testing. The needle must be held securely and must sit on the device axis. An off-axis needle wanders on entry, and the operator compensates by pressing harder.
In cleanroom conditions, assembly also protects the product from bioburden that sterilisation must then reduce to the required level. Cleanroom classification, garment control, and environmental monitoring are part of the product specification, not just of the building.
Stage 5: Primary Packaging
Packaging happens close to assembly because the pack is the sterile barrier. Primary packs must locate the lancet positively, so that the tip cannot contact the pack wall or move during distribution. Sealing parameters - temperature, pressure, dwell - are validated, and seal integrity is checked during production.
Labelling at this stage carries the configuration information that prevents mis-selection downstream: product identity, depth, diameter, and lot. Where a product family spans many variants, the labelling discipline at this point determines whether the right device reaches the right patient.
Stage 6: Sterilisation
Sterilisation is applied to the finished, packaged product. The method is selected for compatibility with the full configuration - needle, hub, and packaging - and validated for the load configuration actually used in production, not for a laboratory arrangement.
Key records: load identification, cycle parameters, dosimetric or biological verification as applicable, and the linkage between load and product lot. Without that linkage, traceability stops at the steriliser door.
Stage 7: Final Inspection, Release, and Shipping
Before release, the lot is checked against the specification: dimensional verification, edge and profile inspection records, packaging and labelling checks, and sterility documentation. The release decision should rest on recorded results, not on the absence of complaints.
Shipping then becomes a continuity problem. Cartons must protect primary packs through stacking and vibration, and climatic protection may be needed where distribution crosses climates. For a steel bladed product with a fine edge, this is a real consideration rather than a formality.
Tooling as the Real Capital
Among all the assets in a lancet factory, the fixtures are the ones that determine product consistency, and they are the least visible to a buyer. A grinding fixture that locates each needle identically converts a variable manual operation into a repeatable one; a fixture that allows a fraction of a degree of movement converts it back.
Two consequences follow. First, capacity is limited by tooling, not by machines, so a supplier promising a rapid scale-up should be asked how many fixture sets exist and what their maintenance interval is. Second, tooling condition is a leading indicator: when fixture wear appears, edge and alignment variation follow within a predictable number of lots. Buyers who track lot-to-lot variation will see it as a trend; buyers who only record pass marks will not.
What a Buyer Should Look For on a Factory Visit
| Area | Evidence to request |
|---|
| Incoming material | Material certification and verification records |
| Grinding | Fixture identification, tool wear records, edge inspection data |
| Apex alignment | Inspection method for multi-facet tips, with magnification and frequency |
| Cleaning | Validation report and residue criteria |
| Assembly | Protrusion length measurement records and sampling plan |
| Cleanroom | Classification certificate and monitoring records |
| Packaging | Seal parameter validation and integrity check records |
| Sterilisation | Load validation and lot linkage |
| Release | Lot file showing inspection results and release decision |
A factory that can produce these documents on request is a factory whose process is documented. A factory that produces them only after several emails is a factory whose process is probably documented retrospectively.
Frequently Asked Questions
Why does a three bevel tip need special fixtures? Because three facets must be ground in separate operations while converging at one apex. Fixture repeatability across operations is what makes that possible.
Is sterilisation performed before or after packaging? After packaging, on the finished product, so that the pack maintains the sterile barrier to the point of use.
How is protrusion length verified? By measuring sampled assembled units against a defined method and tolerance, with results recorded per lot.
Does cleanroom assembly matter for a single-use lancet? Yes. It controls bioburden, which sterilisation then reduces to the required level, and protects the product from contamination during handling.
Conclusion
A lancet's performance is created in the grinding room and preserved by everything that happens after it: cleaning, assembly, packaging, sterilisation, and release. The Blood Lancet Needles With Three Bevel End is a product of that chain rather than of a single clever step, which is why evaluating it means evaluating the factory - the fixtures, the inspection records, and the linkage between lot and tooling condition - and not only the drawing on the specification sheet.