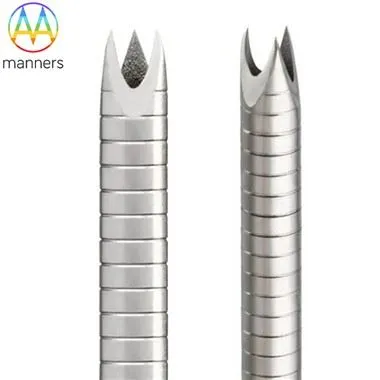
Huber Point Needles In Osteo-Ram Kit Design
Nov 21, 2026
Meta description: How Osteo-Ram style kits combine Huber point needles, removal guides, safety helmets and Luer lock cones for safer marrow biopsy.
A biopsy needle is only as good as the workflow around it. The moment a core is cut, a series of small handoffs begins: stylet out, guide in, specimen released, cap secured, sharp disposed. Huber Point Needles sit at the centre of that sequence, and the kit that surrounds them determines whether each handoff is clean. Osteo-Ram style assemblies show how component design can reduce errors that no single needle can prevent.
Pain Points in Multi-Step Procedures
Marrow biopsy involves at least six discrete steps after the needle enters the bone. Each step is an opportunity to lose the specimen, contaminate it, or expose the operator to a sharp. A bare needle forces the clinician to improvise: a syringe barrel becomes a pusher, a gauze swab becomes a cap, and the core is often extruded onto the drape rather than into a container.
The improvisation is not careless; it is a response to tools that ignore sequence. When a removal guide is missing, operators push the stylet back through the cannula, which can shear the specimen. When no cap is provided, the core can fall out during transfer. When the needle has no safety helmet, the sharp end remains exposed while attention is on the sample. These are design failures expressed as human errors.
Cost enters the same conversation. A kit that costs more per unit but prevents one repeat biopsy or one discarded specimen usually wins on total cost, yet procurement comparisons often stop at the pack price. The calculation should include procedure time, laboratory rework, patient recall and the staff hours consumed by a failed sample. When those items are included, the cheapest configuration is rarely the bare needle.
How a Kit Solves the Sequence
The kit turns the needle into a system. A needle with matched stylet establishes the track. A removal guide, sized to the inner bore, pushes the core out from the proximal end without shear. A safety helmet covers the tip once the needle is withdrawn, so attention can shift to the specimen without leaving a sharp on the tray. A universal Luer lock cone allows aspiration with any standard syringe, and a comfortable cap closes the cannula after stylet removal, preventing premature loss and protecting the sample during transfer.
Ergonomics belong in the same argument. A handle that provides grip, comfort and stability reduces the tendency to over-grip, which in turn reduces tremor and lateral force during penetration. The handle also gives the thumb a controlled contact point for rotation, so the core is severed by a deliberate turn rather than a wrench. In a procedure performed under time pressure on an anxious patient, these small mechanical affordances matter more than specifications suggest.
Sterile presentation completes the design. Components must be arranged in the order of use, with the needle and stylet accessible first and the guide, helmet and cap visible without rummaging. Packaging that enforces sequence is a training tool as much as a container, especially for residents learning the procedure.
Classifying Kit Configurations
Kits divide by procedure intent. Diagnostic marrow kits include the needle, stylet, removal guide, safety helmet and cap, sometimes with a collection tube or fixative container. Aspiration kits emphasise syringes, Luer lock compatibility and volume, and may omit the removal guide. Combined kits serve units that perform aspiration and biopsy in one session and want a single sterile pack.
They also divide by gauge and length, from 8G biopsy instruments to finer aspiration needles, and by sterilisation format: single sterile pack, blister with peel pouch, or bulk non-sterile for reprocessing. The last option is increasingly restricted for sharps, but it remains relevant for veterinary and training models.
A third classification is by customisation level. Catalogue kits use fixed components; custom kits follow a customer's 2D or 3D drawing, adding depth markings, specific guide lengths or branded caps. Customisation is valuable when a unit has standardised a technique, but it multiplies verification work, because every added component must be checked for compatibility with the needle bore and the sterilisation cycle.
Sterilisation format shapes the rest of the design. Ethylene oxide is the common choice for assemblies containing polymers, because it penetrates packaging and is compatible with most handle materials, but it requires validated aeration to remove residuals. Irradiation can alter the mechanical behaviour of some plastics, and moist heat can affect edge geometry and passivation. The kit should therefore be designed for a named sterilisation method from the outset, not adapted to one after the components are fixed.
Practical Guide to Kit Use
Open the pack onto a clean field and keep the components in their sequence. Confirm the stylet is seated and locked before puncture; a stylet that protrudes or sits short changes the tip profile. After cortical entry and advancement, rotate to sever the core, then withdraw along the insertion line.
With the needle out, engage the safety helmet before doing anything else. Remove the stylet, attach the cap if the sample is not being extracted immediately, and introduce the removal guide from the proximal end with steady pressure. Push the core directly into the fixative container rather than onto gauze, where it can dry and distort.
Document the core length and appearance before closing the container, and dispose of the assembly as a single sharps unit. If a second pass is needed, use a new needle and a new kit; reusing components defeats the sequence the kit was designed to enforce.
Training should be built around the sequence rather than the device. A short simulation using an orange or a validated bone phantom lets residents practise stylet removal, guide insertion and helmet engagement in order. Once the order becomes automatic, the components stop being optional accessories and start functioning as the safety system they were designed to be.
Field Experience
Units that adopt complete kits usually report fewer lost specimens and fewer needlestick incidents, but the improvement depends on training. Staff who have not been shown the purpose of the safety helmet sometimes remove it to speed extraction, which reintroduces the risk it was meant to remove. Short, procedure-specific instruction is more effective than a package insert.
Kits also change the shape of the learning curve. A trainee who has only used a bare needle tends to compensate for missing parts with force, and force is exactly what the kit is designed to remove. When the guide and cap are present, the trainee can concentrate on depth and rotation, which are the skills that actually require practice.
From a supply perspective, kit consolidation reduces inventory items but raises the cost of a single stock-out. Departments that standardise on one kit and one backup gauge weather shortages better than those holding many partial configurations. Custom kits should be reserved for high-volume units where the workflow is stable, because a custom component that no longer matches a revised needle becomes obsolete inventory.
Summary
Huber Point Needles perform best when the kit is designed backwards from the specimen. A matched stylet, a correctly sized removal guide, a safety helmet and a cap each address a specific failure in the handoff chain, while an ergonomic handle improves the quality of the cut itself. Kit design is therefore not packaging; it is the last stage of needle engineering, and it deserves the same drawing discipline as the tip.
Outlook
The most likely near-term advances are procedural rather than metallurgical: pre-assembled handles, colour-coded guides, and packaging that opens in the order of use. Traceability will extend to kit level, with a single lot code covering needle, guide and helmet so that a specimen issue can be investigated end to end.
There is also room for procedure-specific kits, such as a paediatric configuration with a finer gauge and shorter guide, or a sclerotic-bone configuration with a heavier tip and reinforced handle. As biopsy volumes grow in oncology and hematology, the kit rather than the needle alone will become the unit of purchase and the unit of quality control.