From Sample To Report: The Laboratory Journey Of Bone Marrow Biopsy And Precision Diagnosis
Apr 14, 2026
From Sample to Report: The Laboratory Journey of Bone Marrow Biopsy and Precision Diagnosis
Q&A Approach
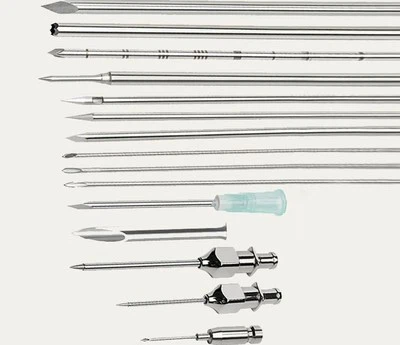
After a 1.5 cm bone marrow tissue core is extracted, how does it undergo a series of complex "transformations" to ultimately become the microscope slide that determines the diagnosis? From fixation and decalcification to sectioning and staining, how does each laboratory processing step impact the final diagnostic quality? Understanding this "behind-the-scenes" journey is the prerequisite for clinicians to correctly interpret biopsy reports.
Historical Evolution
The laboratory processing technology for bone marrow biopsy has been a history of continuously pursuing "fidelity" and "clarity." Early methods used formalin fixation and nitric acid decalcification, often resulting in tissue that was either too hard or poorly stained. The introduction of Ethylenediaminetetraacetic acid (EDTA) decalcification in the 1960s better preserved cellular morphology and antigenicity. The 1970s saw plastic (methyl methacrylate) embedding technology enable the cutting of 2–3 μm thin sections, perfectly presenting cellular details. In the 1990s, immunohistochemistry was successfully applied to bone marrow paraffin sections, enabling the simultaneous localization of cell types and antigens. Today, automated staining and digital scanning are standardizing workflows and quantifying results.
Standard Workflow: Quality Control Points of Nine Key Steps
Step 1: Tissue Fixation
Purpose: Immediately terminate autolysis and preserve morphology.
Standard: 10% Neutral Buffered Formalin; tissue-to-fixative volume ratio ≥1:10.
Time: Fix for 6–48 hours. Under-fixation leaves tissue soft; over-fixation makes it brittle, both affecting sectioning.
Step 2: Decalcification
Necessity: Bone contains calcium; it cannot be sectioned without decalcification.
Gold Standard: 10% EDTA solution (pH 7.4), slow decalcification for 3–7 days.
Contraindication: Avoid strong acids (e.g., nitric acid) for rapid decalcification, as they severely damage cell morphology and antigens.
Step 3: Tissue Processing
Process: Dehydration, clearing, and infiltration with paraffin replace water in the tissue with wax.
Automation: Automatic tissue processors ensure every block undergoes identical gradients of alcohol, xylene, and paraffin baths.
Step 4: Embedding
Key Point: Orienting the processed tissue in molten paraffin to cool and solidify. It is crucial to embed the tissue longitudinally to obtain a complete cross-section from the bone cortex to the medullary cavity.
Step 5: Sectioning
Technical Requirement: Using a specialized hard-tissue microtome knife to cut continuous, uniformly thick 3–4 μm slices. A complete biopsy typically yields 20–30 spare slides ("white slides") for backup.
Step 6: Flotation and Baking
Purpose: Flattening the wax ribbon and adhering it to glass slides, then drying.
Temperature: Bake at 60°C for 1–2 hours to ensure the tissue adheres tightly and prevent detachment during staining.
Step 7: Staining
Routine Panel:
H&E Stain: Assesses overall structure, cell morphology, and cellularity.
Reticulin Stain (e.g., Gomori Silver Stain): Grades bone marrow fibrosis (MF-0 to MF-3).
Prussian Blue Iron Stain: Assesses storage iron within macrophages to diagnose deficiency or overload.
Step 8: Coverslipping and Labeling
Completion: Mounting with neutral balsam and a coverslip for permanent preservation. Clearly label patient information and stain type.
Step 9: Pathological Review and Reporting
Systematic Review: Pathologists "scan" the entire section at low power for structure, then observe cellular details at medium-to-high power.
Report Essentials: Must include bone marrow cellularity, myeloid/erythroid/megakaryocyte ratios and morphology, presence of abnormal infiltrates, degree of reticulin fibrosis, and iron stores.
Special Techniques and Applications
Immunohistochemistry (IHC): Labeling specific antigens (e.g., CD34, CD117, CD3, CD20) on paraffin sections to differentiate acute leukemia immunotypes, lymphoma infiltration, and minimal residual disease.
Molecular Pathology: Extracting DNA/RNA from paraffin blocks for Fluorescence in SituHybridization (FISH), PCR, or Next-Generation Sequencing (NGS) to achieve correlation analysis of morphology and genes.
Sources of Error and Quality Control
Pre-analytical Error: Sample too small or crushed-strictly enforce operational standards.
Fixation Error: Delayed or inadequate fixation-laboratory must receive and process specimens immediately.
Technical Error: Sections too thick or poor staining-internal quality control (IQC) and external quality assessment (EQA).
Interpretation Error: Lack of experience or inconsistent criteria-double-blind review and subspecialty training.
Future: Digitization and Intelligence
Whole Slide Digital Scanning: Converting slides into high-definition digital images for easy storage, transmission, and teleconsultation.
AI-Assisted Diagnosis: Algorithms can automatically quantify cellularity, cell density, and fibrosis area, providing objective, repeatable data to assist pathologists in improving diagnostic consistency and efficiency.
Conclusion
The journey of a bone marrow tissue core through the laboratory is a meticulous process of "information decoding." The rigor of each step is directly tied to the accuracy of the final diagnosis. By understanding the craftsmanship "behind the scenes," clinicians can better grasp the weight of the pathology report before them, engage in more effective dialogue with pathologists, and jointly make the most precise decisions for the patient.