The Swage–Anneal Cycle
Oct 09, 2026
The Pain Point
A common misconception among buyers and even some production managers is that swaging is a single-step cold-forming operation: you take a tube, put it in the machine, and out comes a perfectly formed needle. This naive view ignores the fundamental metallurgy of stainless steel. Every swaging stroke work-hardens the material, reducing ductility and increasing the risk of cracking. Attempting complex geometries-long tapers, multiple steps, sharp bends, or combined flare-and-swage features-in one uninterrupted pass inevitably leads to splits, lamellar tears, or premature field failure. The industry pain point is scrap rates that mysteriously spike on "difficult" parts, delivery delays caused by rework loops, and warranty claims from customers whose needles failed under normal use. The root cause is almost always the failure to implement a proper swage–anneal cycle.
How It Works
Cold swaging deforms the crystal lattice of stainless steel. Dislocations multiply, grains elongate, and hardness rises. After just one or two passes, especially on 316L or 304 in the half-hard or full-hard temper, the material may lose 50% or more of its original elongation. At that point, further plastic deformation without intermediate softening will cause cracking. The solution is a cyclic process: anneal → swage → anneal → swage → anneal → final form. Each annealing step recrystallizes the work-hardened grains, restoring ductility so the next swaging operation can proceed safely.
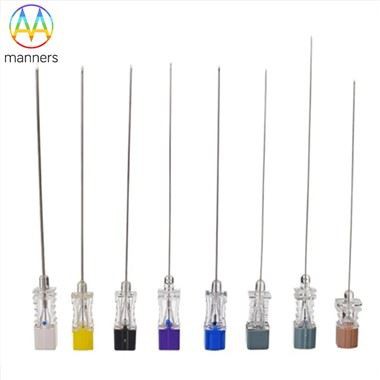
For micro tubes, even a 5% OD reduction per pass may require annealing if the wall is thin. For macro tubes, 10–15% reduction per pass is typical before re-annealing. The number of cycles depends on the complexity of the final geometry. A simple tail neck on a hypodermic needle might need only one anneal before swaging. A multi-step pencil-point spinal needle with a bent shaft and a flared hub connection could require three or four anneal–swage cycles. Each cycle must be documented: temperature, soak time, atmosphere, cooling rate. Over-annealing is also harmful-excessive grain growth weakens the metal and produces an "orange peel" surface texture. The art lies in finding the optimal balance.
Device Classification
Annealing Equipment:
- Bright annealing furnaces – protective gas (N₂, H₂, Ar), used for micro tubes to prevent lumen oxidation.
- Vacuum annealing furnaces – highest cleanliness, used for Nitinol or critical 316L components.
- Induction annealing systems – localized heating for specific zones, fast cycle, good for in-line processing.
- Batch box furnaces – lower cost, used for macro tubes where surface finish is less critical.
- Swaging Equipment:
- 2-die rotary swagers – simpler, lower cost, suitable for basic necking.
- 4-die rotary swagers – better concentricity, smoother finish, preferred for precision medical needles.
- Hydraulic swaging presses – high force, used for 10–30 mm tubes.
- Radial forging machines – for very large diameters or heavy-wall tubes.
Inspection Between Cycles:
Hardness testing (micro-Vickers for micro tubes)
Eddy current flaw detection
Dimensional laser scanning
Metallographic cross-section (sampling)
Practical Guide
Implementing a controlled swage–anneal cycle requires discipline:
Define the forming route. Map every reduction step, bend, and flare. Identify where ductility will be exhausted.
Set reduction limits. For 316L micro tubes, cap at 5–8% OD reduction per pass without anneal. For 304 macro tubes, 10–15% is typical.
Specify anneal recipes. Document temperature (±10 °C), soak time, atmosphere, and cooling method for each anneal step.
In-process inspection. After each swage, check for surface cracks under 10× magnification. After each anneal, verify hardness or perform a bend test.
Tooling maintenance. Swage dies wear and generate heat. Track die life and replace before dimensional drift causes over-stressing.
Traceability. Every lot must carry a process sheet showing anneal temperatures, swage reductions, inspection results, and operator IDs. Under ISO13485, this is mandatory.
Real-World Experience
A manufacturer of pencil-point spinal needles attempted to produce a 22 mm taper in a single swage pass from full-hard 304 tubing. Crack rate was 11%. After adopting a two-pass process with an intermediate bright anneal at 1050 °C for 8 minutes, crack rate fell to 0.15%. The additional anneal added $0.08 per part, but scrap reduction and eliminated warranty claims saved over $4 per part shipped. The process was later refined to three passes with two anneals for even tighter tip geometry, and the product became the OEM's highest-margin line.
In an industrial application, a 15 mm OD probe required a 45 mm long swaged taper plus a 90-degree bend. Attempting this in two operations caused a split at the bend radius. The revised process used three swage passes with two intermediate anneals and a final stress-relief anneal after bending. Helium leak test pass rate rose from 82% to 99.7%, and the customer renewed a three-year supply contract.
Summary
The swage–anneal cycle is not a luxury or a suggestion-it is the only way to produce complex, high-reliability swaged needles from stainless steel. Each anneal restores the metal's ability to deform; each swage step shapes it closer to the final geometry. Breaking this cycle to save time or cost is a false economy that invariably backfires in the form of scrap, rework, and lost customers.
Outlook
As computational metallurgy advances, manufacturers will adopt digital twin simulations that predict work-hardening and crack risk for each swage step, automatically generating optimal anneal–swage sequences. These digital recipes will be transferred directly to furnace and swaging machine controllers, eliminating guesswork. Buyers will receive process validation reports showing simulated vs. actual grain structure evolution. The swage–anneal cycle will evolve from workshop craft to data-driven science, and suppliers who master this transition will set the new industry standard.