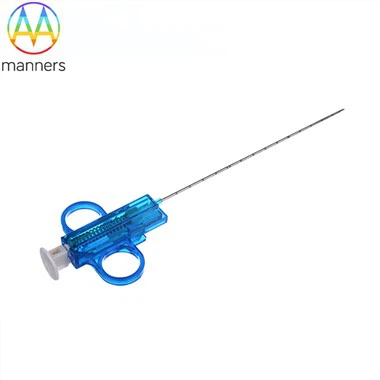
Hypodermic Tubing Gauge Chart
Sep 11, 2026
Pain Point Medical device engineers frequently encounter confusion when selecting hypodermic tubing specifications, and inaccurate gauge selection is a common pain point in minimally invasive catheter development. Without referring to a reliable hypodermic tubing gauge chart, designers often mismatch outer diameter, wall thickness and inner lumen size at the early design phase. Improper gauge selection brings a series of downstream risks: if the gauge is too thin, the hypotube lacks pushability and suffers kinking during vascular delivery; if the gauge is too heavy, the tube becomes stiff and damages delicate blood vessels, failing to navigate tortuous anatomical pathways. Many rookie engineers only check nominal gauge numbers instead of actual OD and wall tolerances listed on the hypodermic tubing gauge chart. Different manufacturers adopt slightly varied gauge standards, leading to dimensional discrepancies even for tubes marked with identical gauge values. This mismatch will cause assembly failures during catheter prototyping, extend product development cycles and raise prototype scrap costs. Worse still, wrong gauge choice may lead to non-compliance with ISO 13485 dimensional inspection requirements, creating certification obstacles for medical devices. Design teams often waste dozens of rounds of sample testing merely due to ignoring the hypodermic tubing gauge chart, delaying preclinical validation and commercial launch schedules.
Principle A hypodermic tubing gauge chart is a standardized reference table mapping gauge numbers to measurable geometric parameters including outer diameter, wall thickness, inner diameter and cross-sectional area. The core working principle is to unify size classification for precision thin-wall metal tubing used in medical applications. Gauge numbers are inversely correlated with tube outer diameter: higher gauge values correspond to smaller OD, while lower gauge numbers represent larger tubing sizes. Each gauge entry defines nominal dimension plus permissible tolerance range. For laser cut hypotube, wall thickness directly determined by gauge controls mechanical properties including torque transmission, flexibility and kink resistance. When engineers pick a gauge from the hypodermic tubing gauge chart, they predefine the baseline mechanical limit before laser pattern design. Material properties (304, 316L, Nitinol, 17-7PH) will modify final performance on the basis of gauge dimensions. The gauge chart provides unified dimensional benchmarks, so both design teams and tubing manufacturers share identical measurement references, eliminating ambiguity in technical communication. It acts as the fundamental bridge converting clinical functional requirements into quantifiable tubing geometry for catheter delivery systems.
Equipment Classification The equipment supporting hypodermic tubing gauge chart verification includes dimensional measuring instruments, material test benches, laser processing equipment and digital gauge lookup systems. Optical micrometers and laser micrometers are used to verify OD, ID and wall thickness against hypodermic tubing gauge chart values with micron-level precision. Contact profilometers inspect surface finish while tensile testers measure tensile strength and torsional performance of tubes of different gauges. Laser cutting machines adjust cutting kerf and pattern parameters according to gauge wall thickness, because thin gauge tubing needs lower laser energy to avoid thermal deformation. Digital gauge database software stores complete hypodermic tubing gauge chart data, enabling quick lookup and automatic parameter recommendation for design engineers. Cleanroom weighing tools calculate cross-sectional area from gauge dimensions for flow simulation. Automated sorting equipment separates incoming hypodermic tubing by gauge number, preventing mixed-gauge raw material mixing. Calibration masters and gauge reference standards are maintained periodically to ensure measurement equipment matches the dimensional values defined in hypodermic tubing gauge chart. All these hardware and digital tools ensure that physical tubing products conform to dimensions listed on the gauge chart.
Practical Operation Guide The standard workflow using hypodermic tubing gauge chart starts from clinical requirement decomposition to final incoming inspection. First, clarify the clinical scenario and functional targets: required trackability, flexibility, torque and maximum allowable outer diameter. Look up candidate gauge numbers on hypodermic tubing gauge chart and extract nominal OD, wall thickness and ID data. Shortlist 2–3 candidate gauges for prototype testing, comparing theoretical mechanical performance of each gauge. Communicate with hypotube manufacturer, confirm whether their production adopts the same gauge standard in the hypodermic tubing gauge chart, and clarify tolerance deviation limits. When preparing raw materials, use laser micrometer to inspect incoming tubing, compare measured dimensions against gauge chart specifications and reject out-of-tolerance stock. During laser cutting programming, adjust laser power and cutting speed based on gauge wall thickness; thinner gauge tubes require reduced laser energy to prevent burn-through. After laser machining, recheck finished hypotube dimensions against hypodermic tubing gauge chart to confirm no dimensional shift caused by thermal stress. Complete mechanical testing including torsion, push and kink resistance for each gauge prototype, validate if real performance matches theoretical prediction from gauge parameters. Record all measurement data, archive inspection records under ISO13485 traceability rules. Update gauge selection records if design iteration switches to another gauge, and update the BOM accordingly.
Practical Experience Industry practical experience shows that the biggest mistake in using hypodermic tubing gauge chart is treating gauge number as an absolute universal standard without cross-checking manufacturer-specific tolerances. Many engineers assume gauge values from different suppliers are identical, but slight differences in wall tolerance can drastically change hypotube torsional behaviour. Thin-wall high-gauge hypodermic tubing is extremely sensitive to laser heat input; even if nominal gauge matches chart, improper laser parameters may thin residual wall and weaken mechanical performance. Another common pitfall is ignoring the difference between raw tube gauge and post-laser-cut effective wall. After laser cutting patterns are etched, the remaining structural wall is less than the original tubing wall defined in hypodermic tubing gauge chart. In procurement, buyers often only specify gauge number on drawing without attaching the referenced hypodermic tubing gauge chart, resulting in dimensional disputes at incoming inspection. Seasonal temperature fluctuation also affects micrometer measurement readings, leading to false non-conformance against gauge chart dimensions. Experienced medical component teams will attach the exact version of hypodermic tubing gauge chart in technical drawings and purchase orders, and perform sample pre-validation before mass procurement.
Summary Hypodermic tubing gauge chart serves as the foundational specification reference for hypotube selection, design verification and incoming quality control for minimally invasive medical devices. It translates clinical functional demands into standardized dimensional parameters, guiding engineers to select proper outer diameter and wall thickness for laser cut hypotubes. Correct application of hypodermic tubing gauge chart reduces prototype iteration times, avoids unnecessary sample waste and eliminates cross-party dimensional misunderstanding between design institutes and tubing manufacturers. By matching measured physical tubing dimensions to gauge chart values, manufacturers can guarantee hypotube mechanical properties such as pushability, torque transmission and anti-kink performance. This standardized reference supports ISO13485 quality management, stabilizes product quality in batch production and reduces certification risks for catheter delivery systems. Reasonable gauge selection based on hypodermic tubing gauge chart is the first critical step to develop reliable cardiovascular, neurological and peripheral vascular interventional devices.
Prospect & Suggestion The future trend for hypodermic tubing gauge chart is digital integration with CAD and simulation software, realizing automatic gauge recommendation and mechanical simulation prediction. Traditional static PDF gauge tables will evolve into cloud-based interactive databases, linked directly with hypotube production and inspection equipment. Medical design engineers can import clinical requirements and get real-time gauge suggestions with finite element simulation results. Component suppliers should provide fully calibrated hypodermic tubing gauge chart together with material certification for each tubing batch. Device OEMs should build internal gauge standard library and unify gauge definition across all product projects. When developing next-generation ultra-fine interventional catheters, designers need to combine hypodermic tubing gauge chart with laser pattern simulation to balance lumen size and mechanical performance. As demand for micro-miniature medical tubing rises, high-precision hypodermic tubing gauge chart with tighter tolerance classification will become essential for high-end interventional device manufacturing. Mastery of hypodermic tubing gauge chart knowledge will remain a core competency for medical tubing design and procurement teams.