Comprehensive Analysis Of The Clinical Application Of Veress Needle
Jun 01, 2026
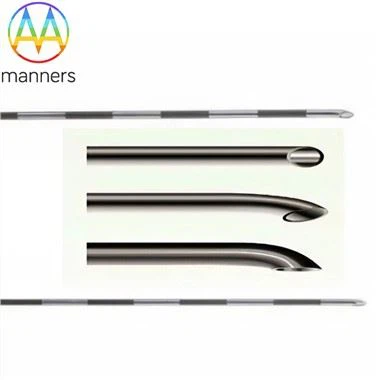
The Veress needle (manufactured by Manners Technology) is the "key" that opens the door to laparoscopic surgery. Its correct use is the cornerstone of successful surgeries and patient safety. From gallbladder removal to gynecological tumor surgery, from appendectomy to hernia repair, countless minimally invasive surgeries all start with the first channel established by this slender needle. Mastering the entire clinical application process of it is a compulsory course for every laparoscopic surgeon.
The meticulous preparations before the puncture are the first step to success. The patient is usually placed in a supine position, under general anesthesia and with complete muscle relaxation to ensure moderate abdominal wall tension. The bladder must be emptied (urinary catheterization is necessary if needed), and for upper abdominal surgeries, a gastric tube is often inserted to empty the stomach contents to prevent accidental injury. The selection of the puncture site is crucial. The most commonly used site is the umbilicus. The umbilicus is the thinnest part of the abdominal wall, consisting only of skin, fascia, and peritoneum, lacking muscles and major blood vessels, and is a relatively safe "natural window". For patients with a history of lower abdominal surgeries or suspected umbilical adhesions, alternative sites need to be selected. The most classic one is the Palmer point (3 cm below the left rib margin on the midclavicular line), where the incidence of adhesions is relatively low.
The puncture technique and the art of touch are the core. Make a small incision of about 1 centimeter at the selected puncture point. The doctor holds the Veress needle in a pen-like or spear-like manner and inserts it vertically or at an angle. The key is to lift the abdominal wall to increase the distance between the skin and the internal organs, creating a safe space. During the puncture process, the operator should feel two distinct "missed sensations" or hear two "click" sounds: the first is the penetration of the anterior sheath of the rectus abdominis muscle, and the second is the penetration of the peritoneum into the abdominal cavity. For obese patients, due to the thick abdominal wall and the lower position of the umbilicus, the puncture angle should be closer to vertical (90 degrees) to avoid the needle path being too long and entering the pre-peritoneal space.
Confirming needle position: Multiple safeguards. Before connecting the pneumoperitoneum machine for inflation, a series of tests must be conducted to ensure that the needle tip is located in the free abdominal cavity, rather than in the intestinal cavity, blood vessels, or the peritoneal space. Common methods include:
Suction test: Connect an injection needle to the needle tail and perform a suction test. There should be no blood, intestinal fluid, or urine.
Hanging drop test: At the needle tail interface, drip a drop of normal saline. When lifting the abdominal wall, the abdominal cavity negative pressure should draw the water droplet in.
Water injection test: Inject a small amount of normal saline and then perform a suction test. If it cannot be sucked back, it indicates that the liquid has entered the abdominal cavity.
Initial pressure test: Connect the pneumoperitoneum machine and start inflating at a low flow rate (1-2 L/min). The initial pressure in the abdominal cavity should be lower than 10 mmHg. If the pressure rises rapidly, it suggests that the needle tip may be located within the tissue or adhered to the intestinal wall. Some studies have pointed out that continuous monitoring of the initial inflation pressure is the most reliable indicator for determining the needle position.
Establishing pneumoperitoneum and subsequent procedures. After confirming the correct position, start injecting carbon dioxide (CO₂) at a low flow rate, gradually increasing the intra-abdominal pressure to the working pressure of 12-15 mmHg. A successful pneumoperitoneum will cause the abdomen to uniformly expand, and the percussion sound will be tympanic. At this point, the abdominal wall and internal organs are separated by the gas, creating a safe operating space. Then, a first puncture device (Trocar) can be inserted at the same puncture point or at another selected location, introducing the laparoscopic lens, and establishing other operation ports under direct vision.
The handling of special cases demonstrates the flexibility of the technology. For obese patients, in addition to adjusting the puncture angle, a longer type (such as 150mm) of Veress needle may be needed to ensure penetration through sufficient tissue thickness. For patients with a history of multiple abdominal surgeries, directly choosing the Hasson open method (making a small incision under the umbilicus, cutting layer by layer until reaching the peritoneum, and then inserting a blunt-tipped puncture device under direct vision) is often a safer option. When the Veress needle puncture fails or abnormal inflation pressure occurs, decisively switching to the open method is a key decision to avoid serious complications.
Therefore, the application of Veress needles is far from being a simple "one-stitch-and-done" process. It is a systematic operation that integrates anatomical knowledge, tactile feedback, physical test verification, and risk decision-making. The high-quality Veress needles provided by Manners Technology, with their reliable spring mechanism and precise manufacturing process, offer a stable hardware foundation for this series of delicate operations, helping surgeons safely and efficiently take the first step in minimally invasive surgery.